I’m so happy to have Katie from Tomorrow, with a smile! She’s got some great stuff happening on her blog so be sure to head over and check it out!
I’m Katie and I blog over at Tomorrow, with a smile. I really, really love people and decided to make a career out of it. That’s how I became a social worker. I’m a not-so newlywed anymore learning {and loving!} to decorate our first house on a budget. Some {ahem.HUSBAND.ahem} would say I’m a little obsessed with my two pups, but I just call it love. Murphy {the Husky} and Jersey {the Weimaraner} are my favorite part of coming home each day. My second favorite part? Getting the mail. {Can I get an amen for Saturday mail sticking around?!} Crafting, cooking, baking, and snagging bargains are some of my other favorites- and make the occasional appearance on my blog. But really, give me a hot cup of tea and quality time with some good friends, and I’m one happy girl.
Eek! Am I really guest posting for Hannah today?! Someone pinch me. Young and Crafty has been on my Top 5 crafty blog list for yearsss. It’s safe to call it a blog crush of mine.
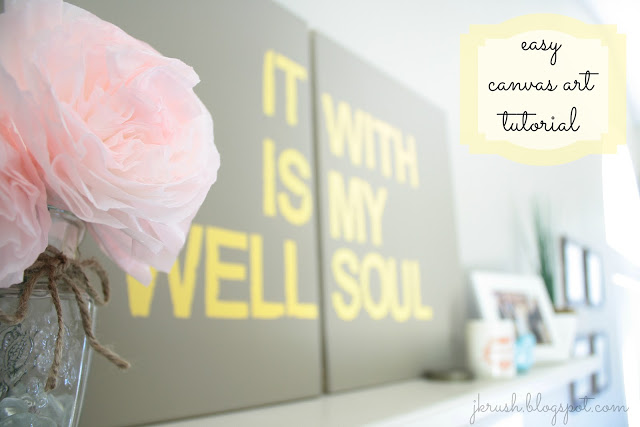
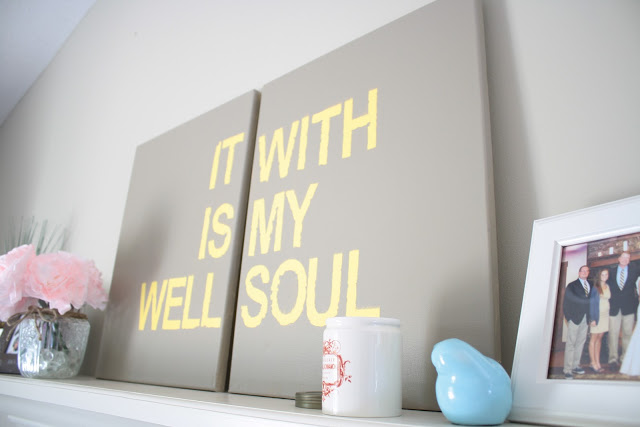
I’m so excited to share one of my favorite tutorials with you today. By now, you’ve surely seen all of the oversized canvas art on Pinterest and Etsy. I am in love! During a Hobby Lobby run a few months ago, I noticed the large canvases were on sale and I picked some up without really thinking what I’d do with them. They sat in a closet for weeks before I finally dug them out and set to work. I really just wung it {winged it? wanged it? No- those definitely don’t sound right} and made it up as I went along. What I really love about these is that they are so versatile. You can make them in any size, color, font, and saying. I have made about 5 as gifts and have one large set hanging in my house. So easy and adorable!
Here’s what you’ll need:
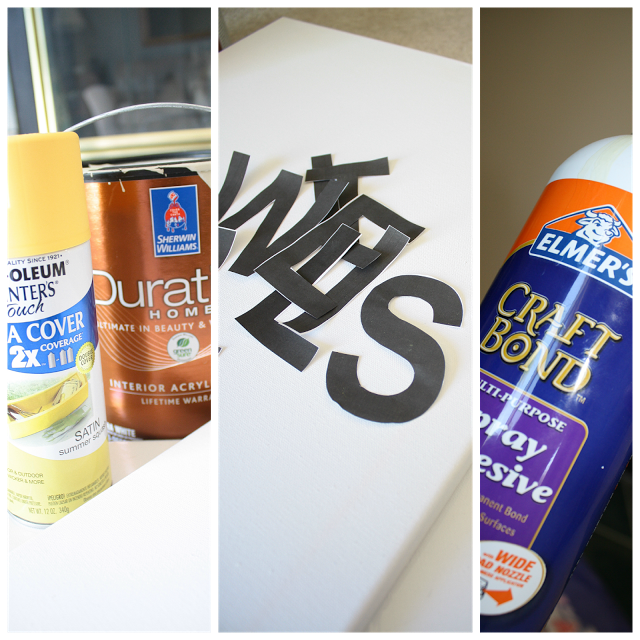
-background & foreground paints. {Any acrylic or spray paint will work! I used the interior paint that matches our living room accent wall since we had some on hand}
-blank canvas
-letters {I printed my phrase from Word onto printer paper. You could also use stickers or experiment with script fonts}
-brush {not pictured}
-spray adhesive
-straightedge
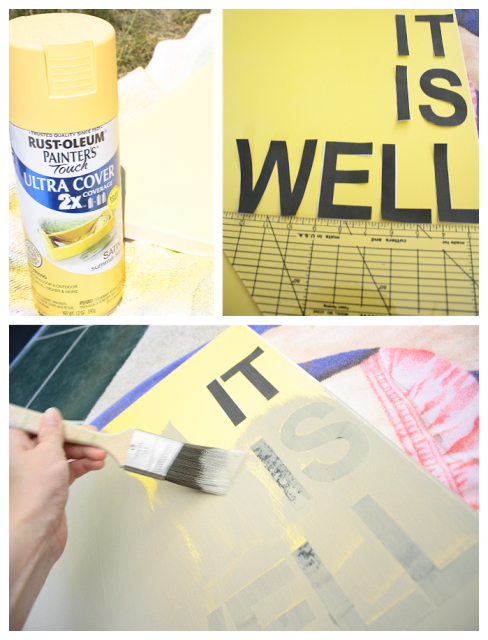
1. Begin by painting the background {the color the letters will be}. If you want white letters, leave the canvas untreated.
2. After the canvas has dried, lightly spray the back of letters with spray adhesive. This should make them tacky, but not permanently stuck to the canvas.
3. Using a straightedge, arrange letters on canvas. When straight, press down to lightly adhere the letters.
4. Paint a generous coat of foreground paint over the letters/entire canvas. Don’t worry about the letters bubbling/peeling slightly-that’s what gives it the imperfect look!
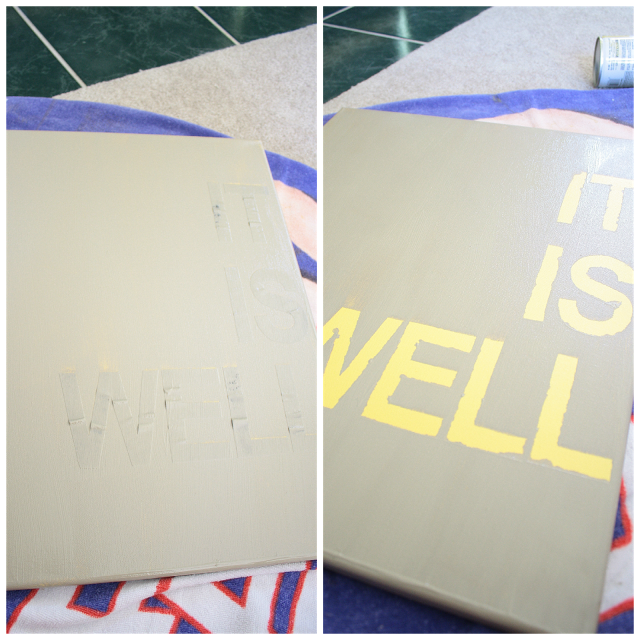
5. Before the foreground paint dries, gently peel off letters. Make touch ups where necessary. Then let the canvas dry completely before hanging/displaying.
Voila! So easy, right?
I’ve kind of been obsessed with making mini-versions of these lately and giving as gifts. I recently used a cursive font (not fun to cut out!) and gave it to a sweet friend for her baby’s nursery.
Have you found something on Etsy and made your own version? Was it easier than you thought?