In case you missed this vintage suitcase shelves tutorial over on
A Diamond in the Stuff, here it is!
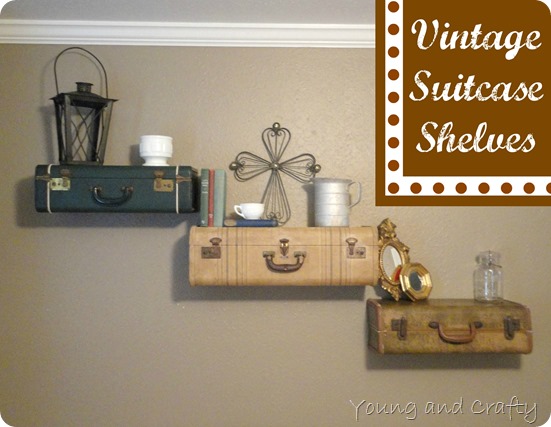
I cannot begin to tell you how much I’m in love with these suitcase shelves. Every time I pass by them I smile a little. All three of these suitcases came from my husbands grandmother who recently passed away. They were perfectly worn, as well as smelly.
I originally planned to stack these and make an end table. However, the left and right suitcases were almost exactly the same size so it just didn’t look right. I started browsing
Pinterestfor ideas and found the suitcase shelf idea. However, I could not find a good tutorial.
This project was totally spur of the moment. My husband and I were sitting in the garage chatting and bored and just went for it. He, of course, thought I was nuts.
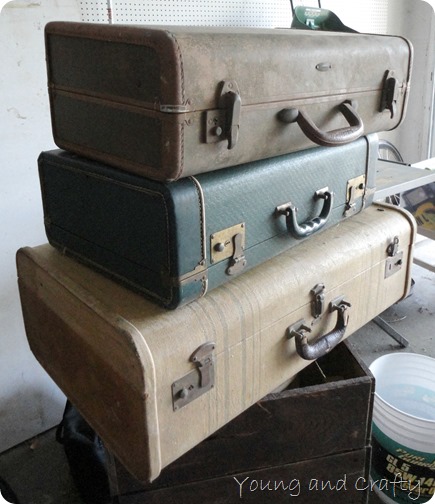
So here is a tutorial for how we made our suitcase shelves.
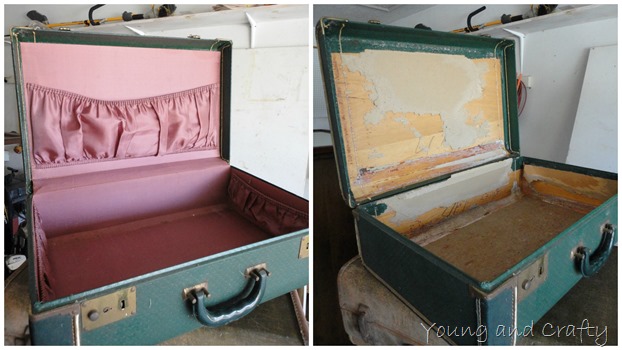
Open them up and check out the beautiful, yet stinky lining. You have two choices, Febreeze the heck-o-la out of it or rip it out. I chose option number two. I think taking the lining out would probably help the blade go through smoother but I can’t say for sure because we didn’t try to cut it with the lining in.
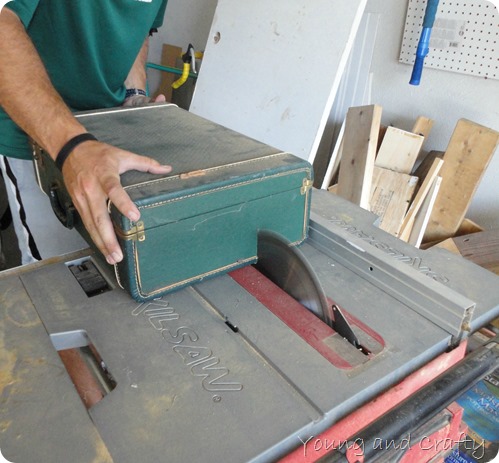
Measure the size you want your suitcase and start cutting it in half on a circular saw. This part is only slightly terrifying. I thought more than once that I was ruining a perfectly beautiful vintage suitcase.
As you can see, the blade did not cut all the way through the bottom layer. You can either take a jigsaw and cut the rest of the way or do what we did. We tilted the suitcase vertical and lined up the circular saw to cut through the rest. Worked like a charm.
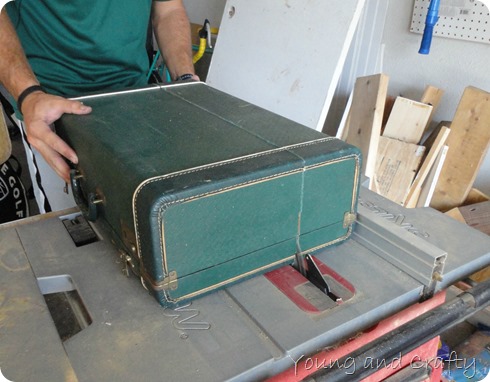
Now flip it over and cut the other side. Make sure your cuts line up! So now you’ve got your shelf and now it needs a way to be hung on the wall.
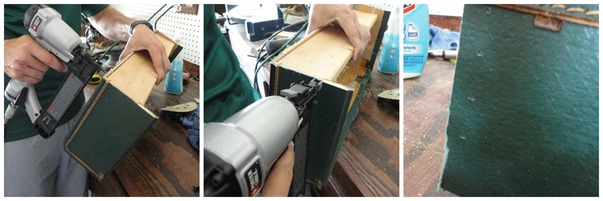
Take a piece of board and cut it to fit inside the suitcase on the BOTTOM piece of suitcase. Then use a nail gun and nail the board in place around the bottom and both sides. As you can see in the right picture, you can see the nail holes but they are soooo tiny that nobody will notice. This was super close and they are hard to see!
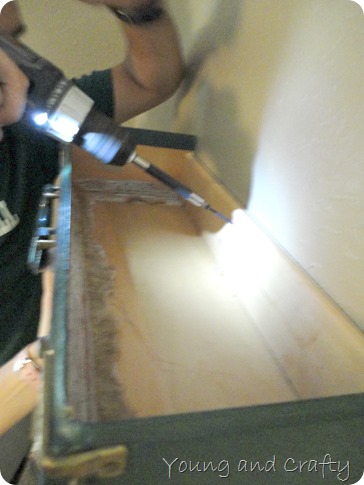
Sorry this picture is such poor quality. I was trying to help hold it up while taking a picture of how to do it! We screwed the piece of wood straight into the studs. Notice that the top is not on? The tops are removable and now the suitcase doubles as storage too! Love that.
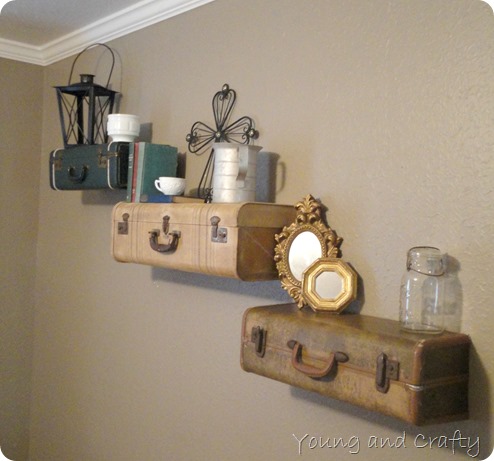
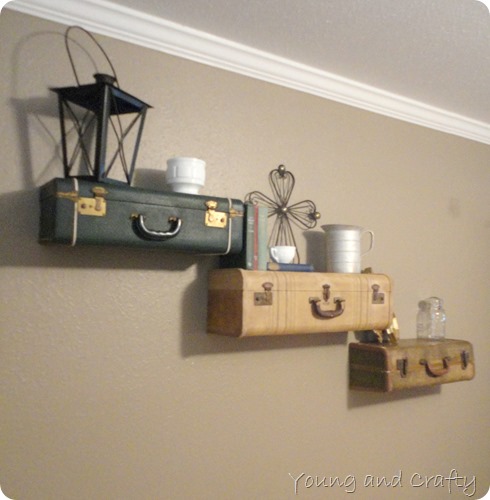
I’m still working on the styling part, but I love the direction they are headed.

The one on the right is my favorite. Or the one in the middle. The green one is just ok.
The lantern on the left also came from Wyatt’s grandmothers and got a paint job. On the center suitcase, the teacup was my great grandmothers. The other stuff is just for looks 🙂
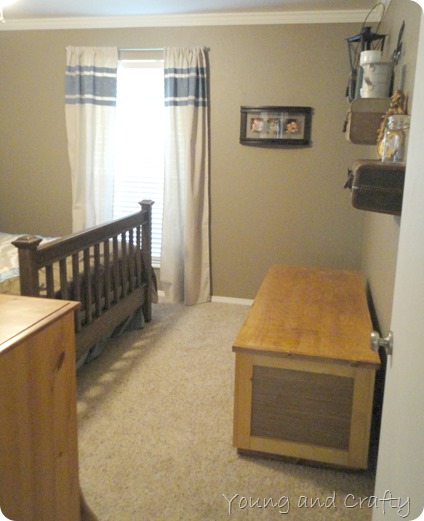
Here’s how they look from the doorway. Find the no sew drop cloth curtain tutorial
HERE. Want to see what used to be on the suitcase wall? Go
HERE. Wow, this is about a zillion times better.
Oh and the gigantic box underneath them is staying. Wyatt and his dad made it and it holds all of our snow skiing gear. I may eventually make a cushion for it. The only problem is that thing is massive. I’m talking coffin size. Maybe even a double coffin. You get my drift. HUGE, I tell ya.
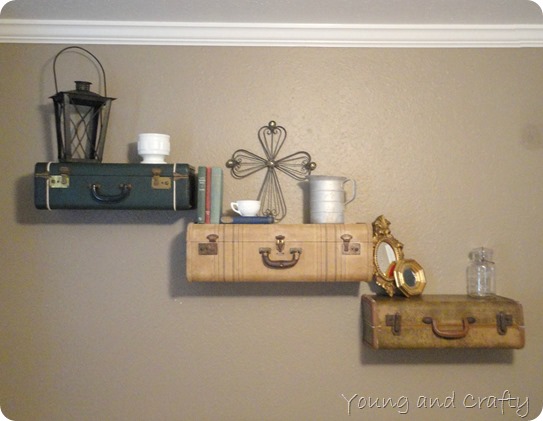
I love that they are unique and can still be sentimental.
Be sure to hop on over to Young and Crafty to see MANY more projects!